The best online fitness resource you'll ever need. We filter out the BS to ensure you meet your health and fitness goals!
The best online fitness resource you'll ever need. We filter out the BS to ensure you meet your health and fitness goals!
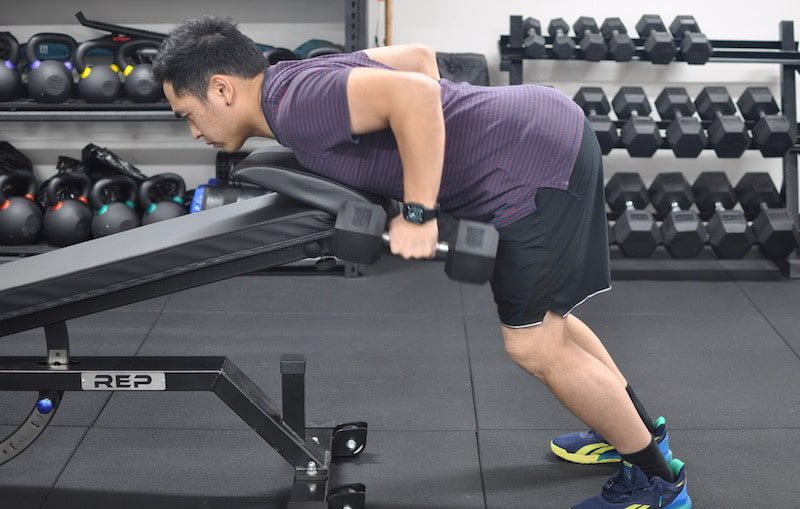
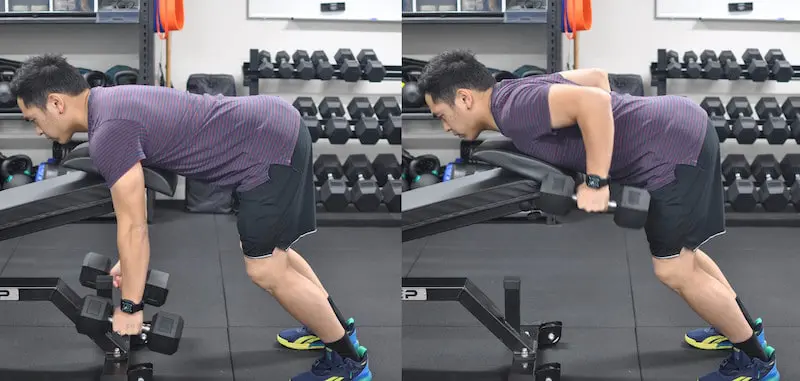
The Helms Row is a free-weight chest-supported row variation that utilizes an adjustable incline bench and two dumbbells. The bench is set up at a height that allows the chest to rest against its top edge, with the torso roughly parallel to the floor.
The bench support enforces the movement to be as strict as possible eliminating the tendency to heave the dumbbells during the movement, as well as decreasing the amount of stress placed on the lower back.
The torso’s horizontal positioning also enables the helms row to provide for a greater range of motion than the more well-known barbell bent-over row.
| Also Known As | Chest-supported Row, Chest-assisted Row |
| Primary Muscles | Teres major, Posterior deltoids, Middle traps, |
| Secondary Muscles | Latissimus dorsi, Rhomboids |
| Movement Type | Strength |
| Movement Mechanics | Isolation |
| Level | Easy |
| Equipment Required | Dumbbells, incline bench, towel/padding |
Helms Rows themselves are easy. It’s setting up that’s the trick. We’ve provided our suggestions for set-up. The rowing motion itself shouldn’t change.
Experiment with the set-up technique that works best and that is safest for you.
Helms Rows work several muscles of the back that contribute to rowing motion. It’s a compound movement that doesn’t work any single back muscle best but makes a good, solid exercise to hit several individual muscles at once. Think of working an entire chain and not one single link.
Helms Rows work the teres major, the latissimus dorsi, the posterior deltoids, the middle trapezius, and the rhomboids.
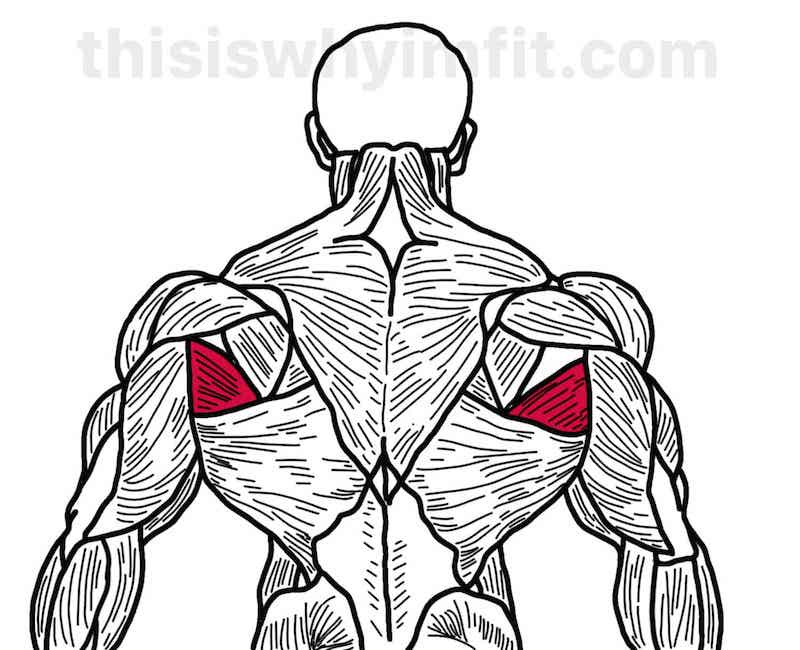
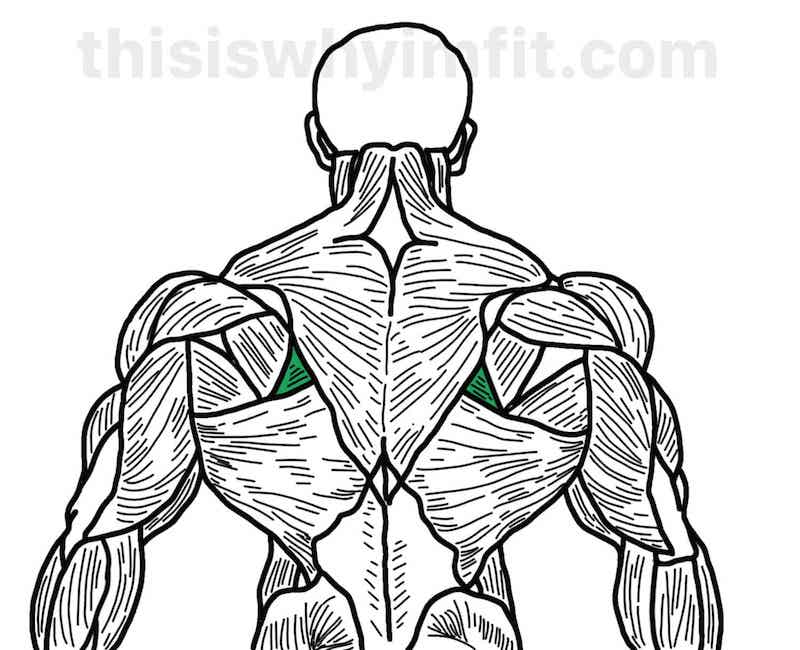
The teres major moves the arm backward and inward.
It’s sometimes called the little lat because it’s smaller than the lat and has the same “job”. It originates on the underside of the shoulder blade and attaches on the front side of the upper arm bone near the shoulder joint.
The teres major forms that little bulge just above where the lats meet the armpit. Helms Rows rely on the teres major to pull the arm back, so it gets lots of attention during the exercise.
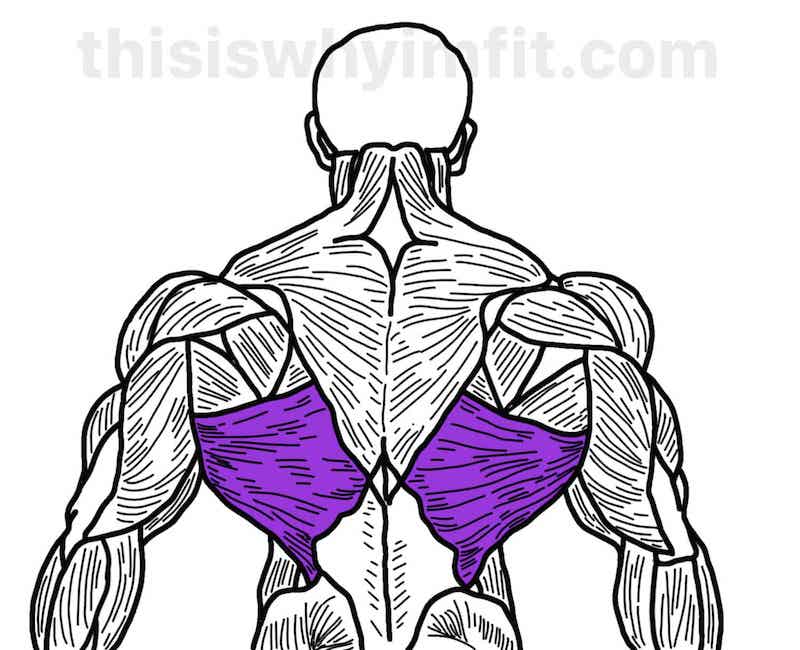
The lats’ job in life is to pull the upper arm down and in toward the rib cage.
An inconvenient truth for us worker-outers is that rowing exercises do not isolate the lat best. Saying so is gym heresy and guaranteed to start an argument amongst the brethren.
The anatomical reality is that the lat works best when it pulls the upper arm down and in toward the side of the body, as it would if you were kneeling in between two cables with the handles at 10 o’clock and 2 o’clock and pulling.
The motion must be from arms wide back to the side (aka the rib cage). A wide handle lat pull down is nearly the same.
The lats originate along the spine and insert under the upper arm. Muscles work best when resistance is in direct line between origin and insertion. The late great Fred Hatfield, aka Dr. Squat, is credited with saying, “Line up insertion and origin and [pull] against it.”
Rows cannot provide that optimal path of motion because the arm moves more or less straight back.
Helms Rows do work the lats but are not the best exercise for latissimus dorsi hypertrophy. A person would literally need to do dozens more of them to get the same muscle-building benefits as pulling inward.
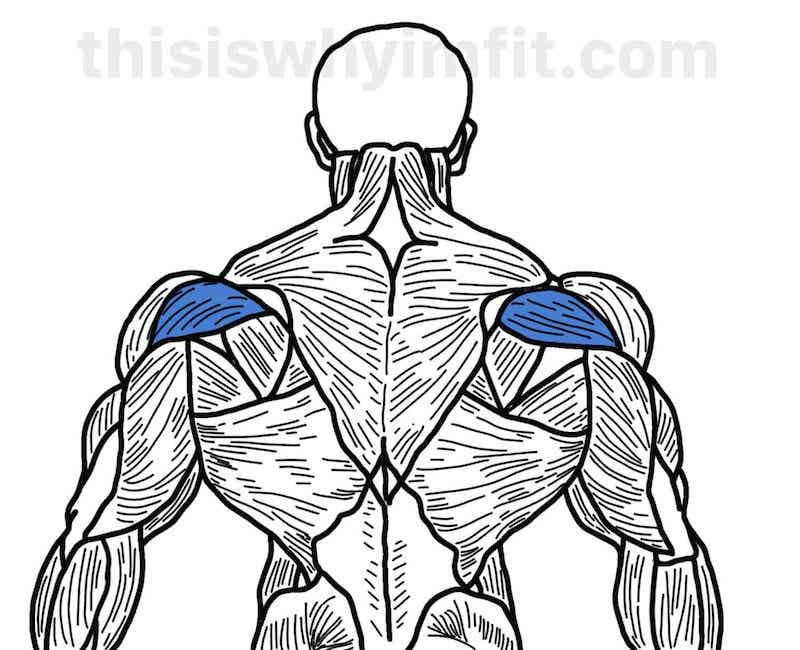
The Helms Row starts with the upper arm bone moving backward and the muscle that gets the weight moving is the posterior delt. That’s because the Helms Row requires the shoulder to extend, and the posterior delt does that.
When the arm is extended under resistance, the posterior delts are among the first muscles to exert force to move the weight toward the body.
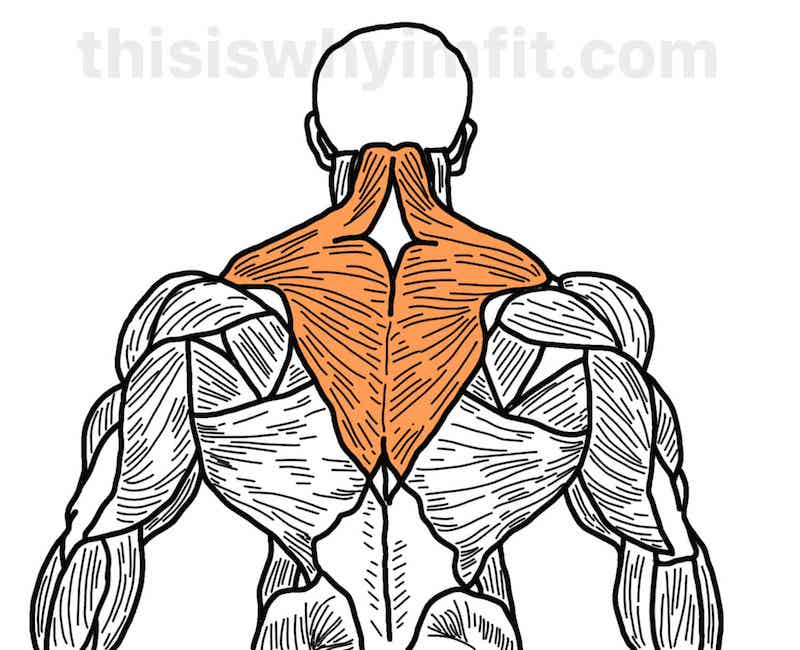
The middle traps are responsible for pulling the shoulder blades back and inward toward the spine. The more you let your shoulder blades “sag” forward at the beginning of each rep, the greater the workload and range of motion for the middle traps.
The middle traps are what add thickness to your upper body when in profile. When combined with a muscular chest, you’ll achieve an overall thicker look when viewed from the side
The Helms Row works the middle traps when the lifter completes a full range of motion, the shoulder blades are squeezed strongly together, and the rep is held briefly at the top by the middle traps.
The feeling is akin to standing at military attention with the shoulders pulled back and down while the chest is pushed out.
A slow controlled eccentric downward motion will also work the middle traps as long as the lifter employs the back for the motion and not the arms.
Training the middle traps can contribute to good posture. Desk jobs and electronics have made almost everyone more hunch-backed. Developed middle (and lower) traps help pull the shoulders back into proper alignment.
Good posture also accentuates the pecs, adds height from standing up straight alone, and projects overall confidence.
The rhomboids lie underneath the traps. They’re important to any motion that requires the shoulder blades to move backward and upward but you’re not ever going to see them, unless you attend a gross anatomy lab.
Rowing motions require the rhomboids to work. They’re not large muscles, so rowing motions are a reliable way to work them to capacity. Only be aware that rows do not isolate the rhomboids. You could perform a row even if you had no rhomboids or if they were somehow incapacitated.
Rhomboids are frequently confused with the middle traps. You may have heard people in the gym talk about training their rhomboids while pointing to their middle traps. Again, the rhomboids are not visible, so any training of them will be for functional benefit.
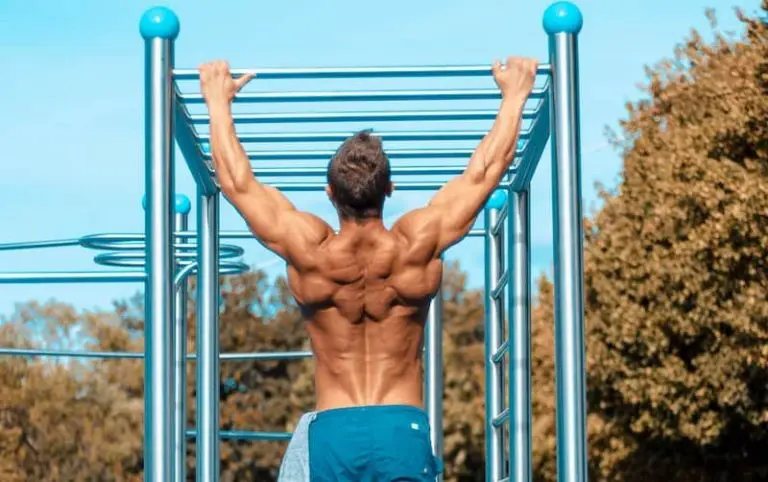
Related: What Muscles Do Pull Ups Work?
Helms Rows and other chest-supported rows prevent some common errors in form but not all. Avoid these easily-made mistakes when doing Helms Rows.
Your chest and shoulders should be the same distance from the floor as your hips. If they are higher, lower the adjustable bench to achieve that preferred parallel orientation with the floor.
Setting up at an angle will reorient the exercise into an upper trap and posterior delt movement. This is fine as long as you’re aware of it and are programming it intentionally with this in mind as a means to train those muscles..
Some guys (and yes it’s usually the guys) can’t help themselves. More weight means more strength, which equates to more muscle.
This is not supported by science or by observation of champion physiques. The best physiques in the world were built by rhythmically pumping appropriately heavy weight using reps done with pristine form and without the assistance of momentum.
If the weight you’re lifting would continue traveling upward–even a very short distance–were you to release it, you’re using momentum.
The legs are a frequent culprit for momentum creation. “Hitching” at the knees to give each rep a little giddy-up only cheats your back out of the work it needs to grow. Same with jerking the weight with the elbows.
Think rhythmic and controlled for each rep.
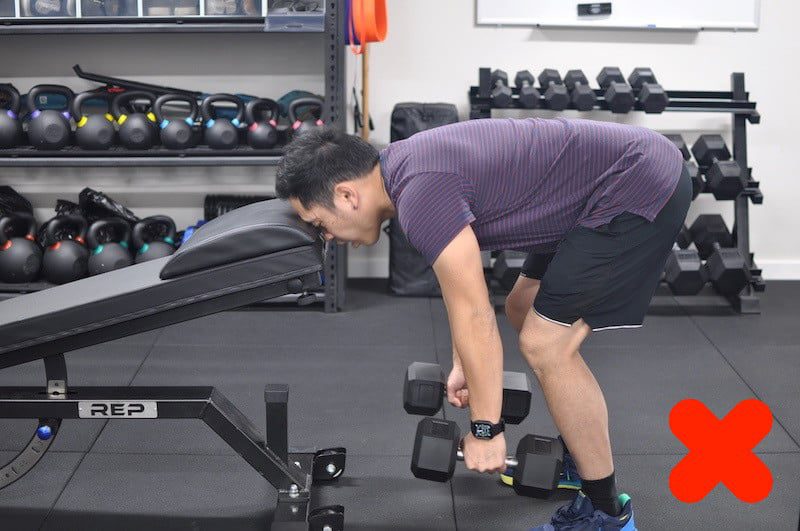
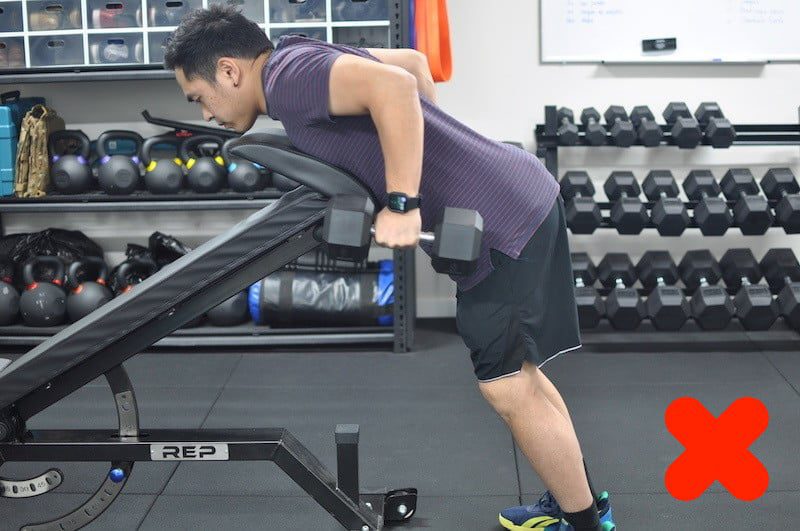
As a survivor of a near-catastrophic spinal cord injury of the neck, I say with confidence and authority…support the Helms Row with chest against the bench. Do *not* support your weight by placing your forehead on the pad instead. Just don’t. It’s just flat-out stupid, delivers zero benefit, and risks crippling injury.
Where should you put the Helms Row in your workout?
Helms Rows can be programmed like any other row. Your rep and set scheme will dictate how. They’re not a strength exercise per se, so rep ranges will start around 8 and rise from there.
The Helms Row works well when programmed as a primary back exercise for back day, as part of a push-pull routine, or as an accessory exercise following deadlifts.
Following are suggested programming for consideration…food for thought. Experiment within rep and set guidelines, remembering that Helms Rows are to be done strictly.
Once you’re warmed up…
| Exercise | Reps | Sets |
|---|---|---|
| Lat Pull-ins | 8-12 | 3-4 |
| Helms Rows | 12-15 | 3-4 |
| Dumbbell Shrugs | 12-15 | 3-4 |
Following a good warm-up…
Here’s an alternating scheme:
| Exercise | Reps |
|---|---|
| Dumbbell Flat Bench Press | 12-15 |
| Helms Rows | 12-15 |
| DB Flat Bench | 10-12 |
| Helms Rows | 10-12 |
| DB Flat Bench | 8-10 |
| Helms Rows | 8-10 |
And here’s a more traditional push then pull framework…
| Exercise | Reps | Sets | Notes |
|---|---|---|---|
| DB Flat Bench | 8-15 | 3-4 | Reps decreasing as weight increases |
| Helms Row | 8-15 | 3-4 | Reps decreasing as weight increases |
Let’s say you’re training for a powerlifting competition. You’re at the earlier phase in your cycle and want to work the accessory muscles for foundational strength. Here’s a suggested program…
Following your deadlifts:
| Exercise | Reps | Sets | When to do them* |
|---|---|---|---|
| Helms Row | 8-12 | 3-4 | Weeks 12 through 10 |
| Helms Row | 12-15 | 3-4 | Weeks 9 through 7 |
| Helms Row | 15-20 | 3-4 | Weeks 6 through 4 |
Drop accessory work Week 3 through contest to avoid overtraining and facilitate recovery periods leading up to the competition.
* Note: Competition programming is written in reverse order. A competition cycle starts 90 days from the the meet, ergo 12 weeks.
Accessory work is dropped several weeks before competition to accommodate the heavier primary exercises and to allow for full recovery.
A traditional strength training cycle for a competition is 12 weeks in length. This assumes that the lifter has stayed in condition using an off-season routine. If they’ve “let themselves go”, the cycle is longer…but anyone who’s trained for a lifting meet will know this, therefore assumed.
Following are three of our favorite suggested Helms Row alternatives you can try on your own.
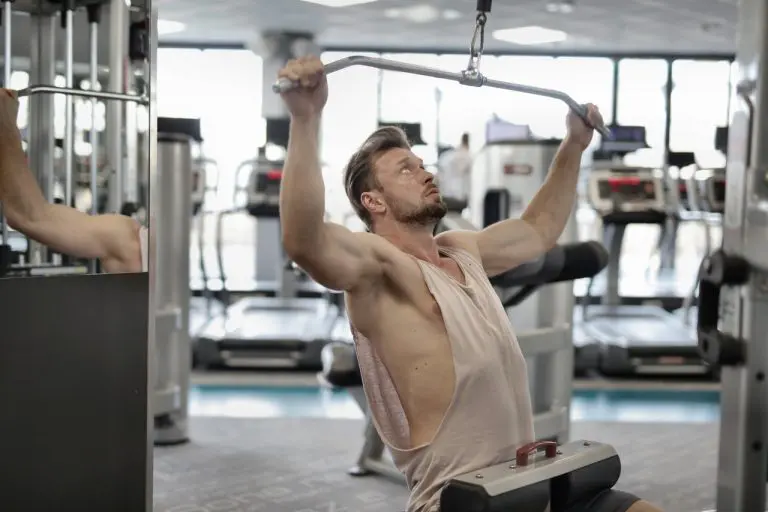
Chest supported row machines provide the same direction of pull as Helms Rows and somewhat prevent cheating.
Resistance is at ~90° to the upper body although the torso is upright and perpendicular to the floor rather than parallel. Doesn’t matter because resistance is out in front, so your back knows no difference. Works the same.
Cheating is easier on a supported row machine. You can lean back and heave the weight toward you. Keep the chest against the pad and make your back to do all the work.
Used properly, chest supported row machines are almost identical to Helms Rows, depending on where the machine’s handles are located (narrow or wide).
Chest Supported row machines are available for use with free weights, or selectable weight stacks.
The machine makes doing chest supported rows simple:
At first glance, the seated supported chest row machine “pulls” in the wrong direction. It doesn’t. In fact, it’s identical to the Helms row.
The back muscles pull in precisely the same direction versus resistance in both the Helms Row and seated row machine. The images below explain the point.
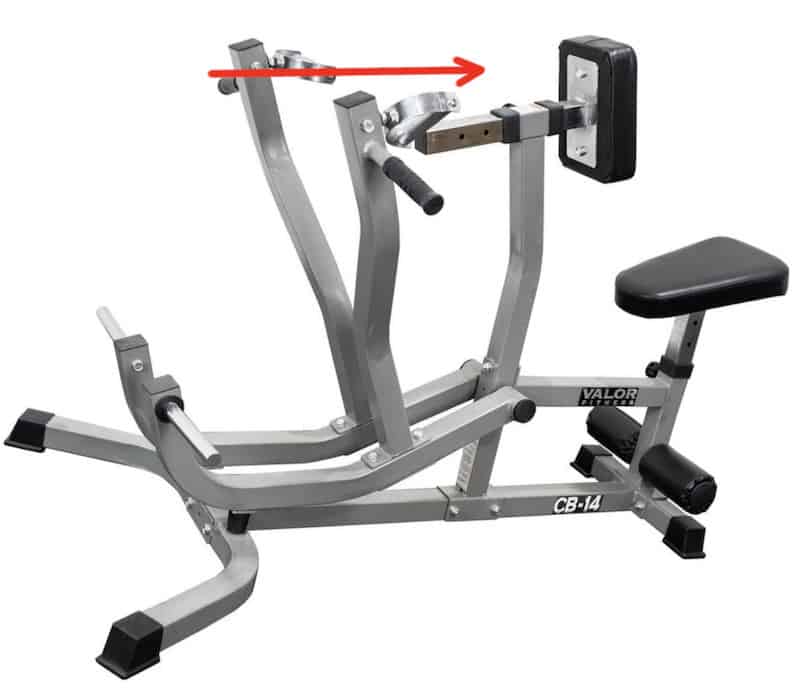
The chest supported row machine’s direction of handle pull is from left to right as shown in the image above.
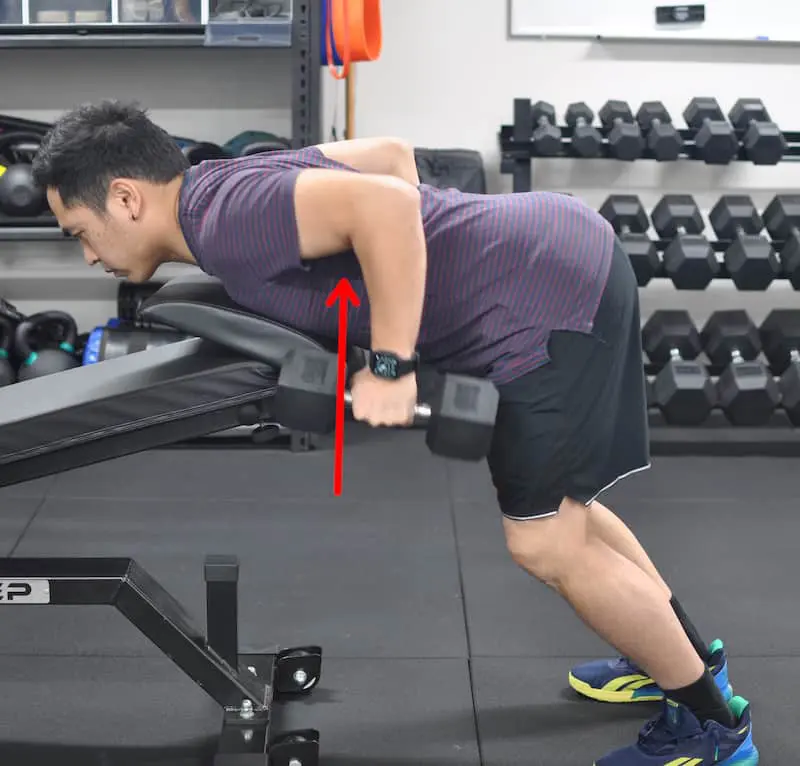
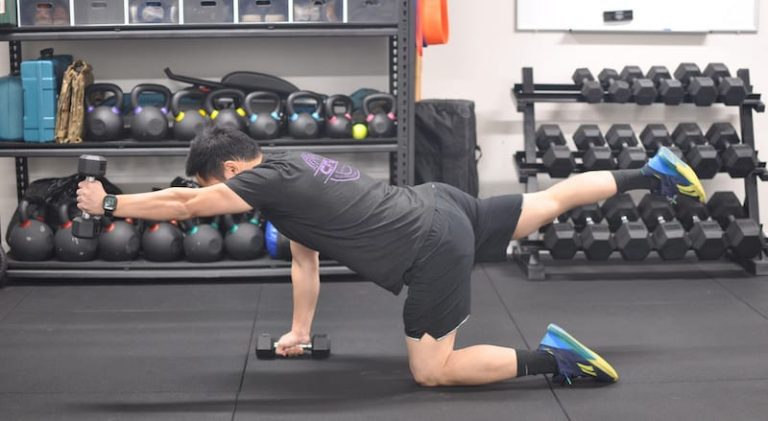
With the helms row, resistance is “in front” of the chest, which in this case is downward – and so the direction of pull is down to up.
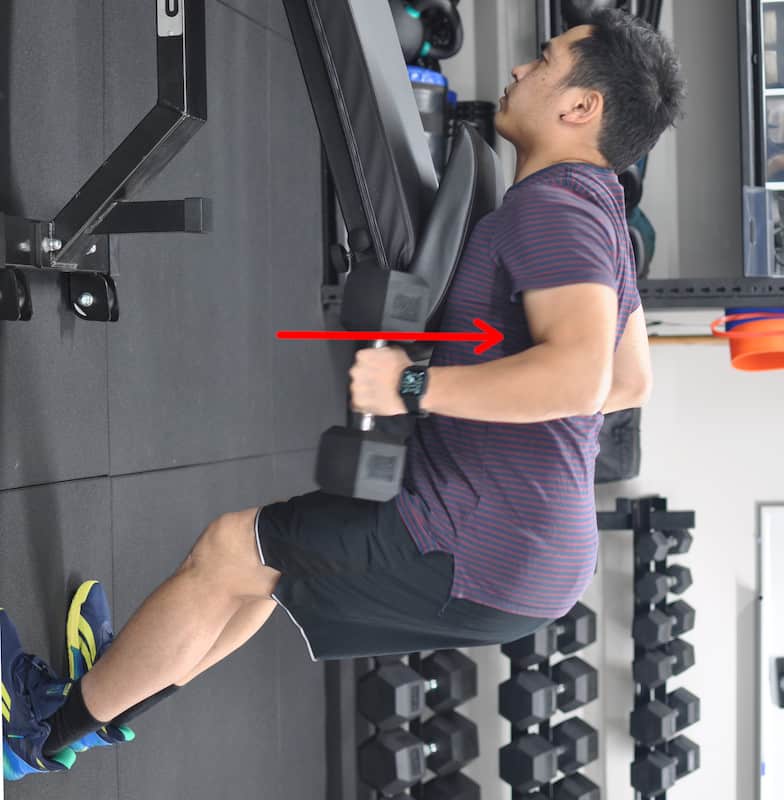
This is the Helms Row image above turned 90°. It shows what a Helms row would look like if the lifter were pulling a weight from in front as it would be with a supported chest machine.
You can see that the motions are identical for the dumbbell and machine, as far as the back muscles are concerned.
The mechanism of the machine positions the load in exactly the same relation to the back muscles.
Perhaps the biggest benefit of this Helms Row alternative is the comfort the chest pad adds, as opposed to the edge of an inclined bench. I know we’re supposed to be tough and impervious to discomfort, but hey, let’s concentrate on the discomfort in the target muscles and not in places it doesn’t matter.
TRX rows (or rings) are a terrific Helms Row alternative. You obviously face in a different direction–up instead of down–but you still pull upward against resistance.
TRX rows are self-limiting since you’re lifting your bodyweight. To add resistance, put your feet up on a bench, or wear a weighted vest.
Cheating is very difficult, another benefit of the TRX Row.
To do a TRX Row:
The ubiquitous TRX (and other suspension trainer brands) can be used anywhere. They make a perfect travel workout accessory.
If you’re fortunate enough to work out in a gym that has one of these babies, count yourself lucky.
The plate-loaded, chest supported T-bar row machine aligns resistance with target muscles and prevents almost any cheating. Although there are always those special dudes who find ways to cheat the reps no matter what.
To use the plate-loaded, chest supported T-bar row machine:
Related reading: The Best Horizontal Pulling Exercises