The best online fitness resource you'll ever need. We filter out the BS to ensure you meet your health and fitness goals!
The best online fitness resource you'll ever need. We filter out the BS to ensure you meet your health and fitness goals!


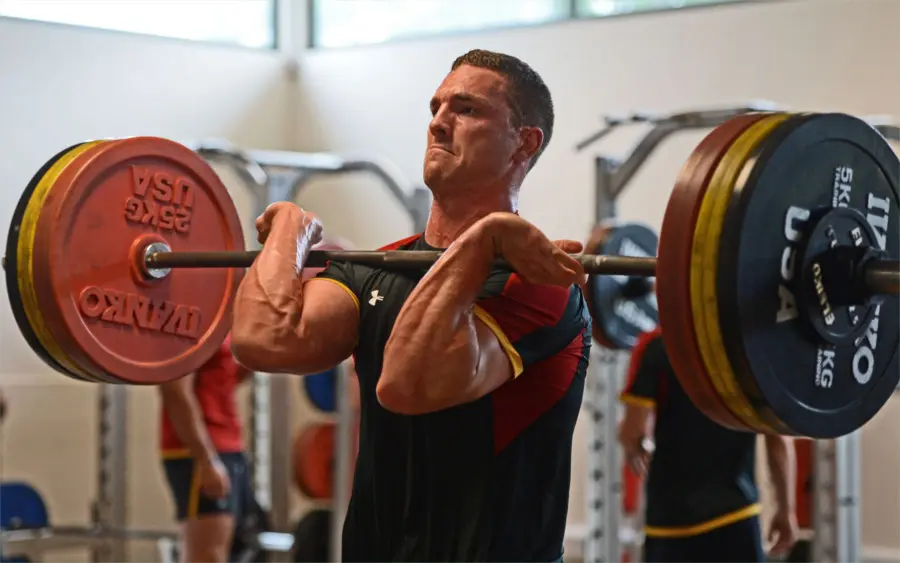
The Clean is an explosive and full body exercise that can benefit any athlete in any sport, if performed with the correct technique. This exercise (like all Olympic lifts) is extremely technical and requires precision if you want to attain maximum benefits while simultaneously reducing your risk of injury.
Most people who work out regularly have done squats, deadlifts and bench presses at some point. However, most people have not had the opportunity to do any Olympic Lifting or their variations prior to CrossFit.
Olympic Weightlifting is an International Sport where people compete in two lifts: The Snatch and the Clean & Jerk.
The rise of CrossFit has kicked off a huge surge of athletes completing these lifts. However, the highly technical nature of these lifts combined with the innate difficulty predisposes them to massive errors. They are multifaceted and challenging to both learn and teach.
In this article we are going to look at the mechanics of the Clean and some tips for correct lifting technique. This highly technical movement, if done with good form, will provide a solid base for performing more complex compounds lifts like the Clean & Jerk.
The clean, simply put, is the movement by which the lifter takes a barbell from the ground to the “front rack position”.

When discussing cleans you will often hear people discussing different variations of them:
These are three of the very popular variations of the clean found throughout the sport of Olympic Weightlifting, CrossFit and sports performance training. All movements are equally useful to athletes, each presenting comparable yet distinct benefits.
In simple terms, it is a Power Clean, the word ‘hang’ purely refers to the start position. This means rather than starting with the bar on the ground, like the Power Clean, the Hang Power Clean starts from a ‘hang’ position.
The start position of the Hang Power Clean can range from hip height to mid shin position.
Some differentiate between a High Hang Power Clean and a Low Hang Power Clean, where
The power clean is extremely similar to the hang clean, but you start with the bar on the floor rather than from the hang position. This demands greater flexion at your hips and knees in the starting position
There is a solid reason that so many pro sports teams choose variations of the clean in their training: it teaches force production like no other movement. Working on the clean can help to:
The Clean trains what is known in the sports world as “triple extension”. Triple extension refers to any movement in which your ankles, knees and hip joints are required to extend simultaneously, this is an essential movement for athletic performance. Cleans also employ fast-twitch muscle fibres, which produce the greatest force and speed.
The Clean works the entire body, your core, quadriceps, hamstrings, calves and glutes are the real driving force behind the bulk of the movement, but your traps and shoulders are also engaged in the second phase.
Power Cleans help athletes to build more than strength, they build full body power, which translates into the ability to move quickly. This is an essential tool for any athlete who needs to achieve more speed but can benefit everyone.
A well-executed, safe Clean is not purely a product of practice and repetition. It is built by both of these in addition to a foundation of movements such as front squats and Romanian deadlifts, both of which have a striking similarity to sections of the Clean.
Prior to working on the clean, developing a proficiency in both ‘starter drills’ will help with your understanding and your implementation of the Clean.
Front Squat: is a fantastic tool to work on both the knee and hip extensors, and it also helps to build strength and balance in what will eventually be the receiving position for the Clean.
Romanian Deadlift: a brilliant drill to strengthen the muscles utilized in the second half of the power clean. The hamstrings and glutes fire concentrically, and the erector spinae muscles isometrically.
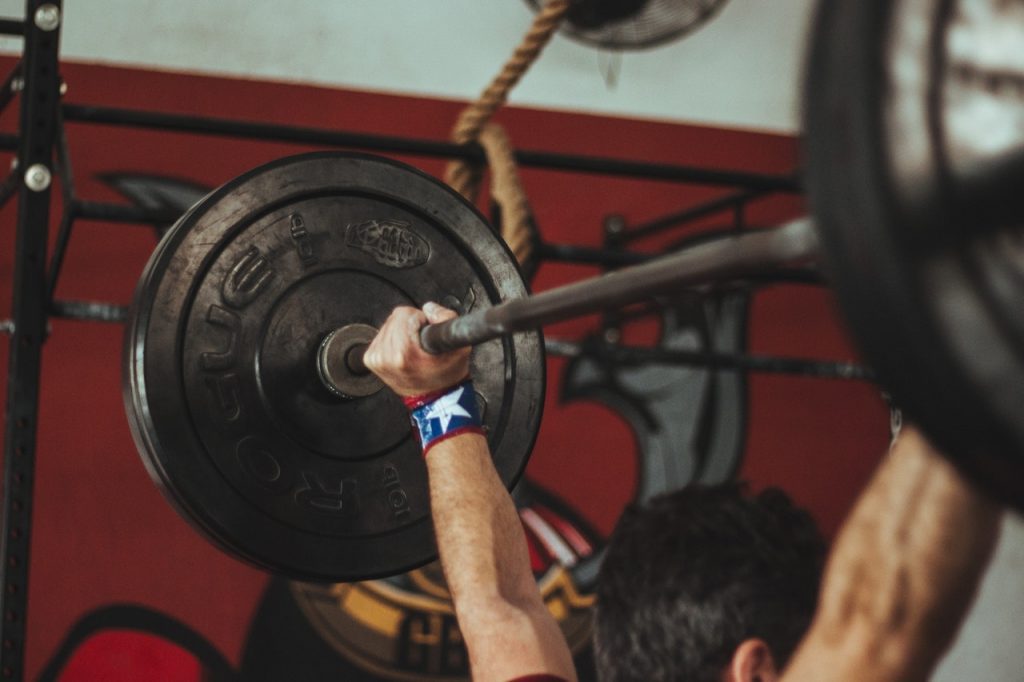
Clean Pull: similar mechanically to a deadlift, but with the clean pull you will be pulling the bar as hight as you can.
Plyometrics (Box Jump, Depth Jump, Box Skip) These are the best drills to teach you how to produce more power.
The setup of the clean is critical to a good lift. Many faults in later stages of the clean are affected by poor setup. When this is correctly addressed it can help to reduce the chances of some common errors.
Set the feet about hip width, in a vertical jump position*, with the feet slightly turned out, as this will allow you to keep your knees tracking over your toes. Shoulders must be over the barbell and your hips lower than your shoulders but above your knees. Keep your shoulder blades back and down and your core tight. Your elbows should be rotated out to the sides with your arms completely straight. Look straight ahead.
* The execution of a clean has many similarities to a vertical jump. Therefore, a great way to a starting point for the clean is to establish a correct jump position. To achieve this, take a step forward, as if you were about to do a two-footed vertical jump, but instead of jumping simply freeze in the two-footed jump position.
The first pull starts from the instant that you lift the bar off the floor and finishes when it is just above your knees. There is a common misconception that the clean is a fast, explosive movement from the very start, which is not the case. This part of the lift is similar to the first phase of a Romanian deadlift where you pull the bar off the floor at a deliberate but not hasty tempo.
How to Do It:
Tip: The goal of the first pull is to gain momentum of the barbell, and to put both the barbell and lifter in the best possible position for a solid, explosive, second pull.

The second pull refers to the section of the lift where the barbell passes the knee and moves into the explosive phase. This is unsurprisingly the part of the lift where things speed up. Once the barbell passes your thigh, the second pull is an extremely explosive motion often described as the “jump and shrug”. When performed correctly there is a moment where the bar should feel completely weightless.
How to Do It:
How to Practice It:
A great tool for working on coordination of the clean is the power shrug. Begin with the bar at mid-thigh, perform the “jump” movement described above, concluding with a strong shrug of the shoulders. Let your arms bend a bit, and simply let the bar drop back down to the starting position.
Tip: A common mistake with the clean is that people bend their arms too early, which lets the bar drift away from their bodies and makes the rest of the lift much harder than necessary.
This is the most technically challenging part of the lift; this is where you position yourself underneath the bar as it rises before you, and you catch it on your shoulders.
How to Do It:
How to Practice It:
Complete front squats – these can be partial squats – in the rack position (with the bar resting on your shoulders, fingertips maintaining it in place). Work on the receiving position, keep your elbows up, torso upright and your eyes ahead.
Tip: This step is about speed, not strength, don’t try and grip the bar with all your might, you only need your fingertips on the bar to steady it into a comfortable rack position.
The key here is control, for most of us who are not training in specialized lifting clubs with special plates designed not to damage the floor, we will have to lower the bar carefully. Once you have finished the lift, lower your elbows and maneuver the barbell to your mid-thigh with control. Always keep your hips and knees soft here and catch or cushion the bar as it comes down. Then lower the bar back to the floor (or to a hang position) as if performing the lowering phase of a Romanian Deadlift.

Due to the complexity of the clean, it is a move that should be practiced frequently. Be careful though, this does not mean that you should overdo it with the load. Your workouts should for the most part, be completed with manageable weights—typically somewhere between 60 to 85% of your max.
The speed of your movement counts for a lot more than your load. Your goal should be to attain max velocity on every rep. With explosive movements, it is best to keep your reps low – 1-5 reps per set.
Of course, you can occasionally work on your 1 rep max, but working on form and speed will be much more beneficial to your training.
Correct technique for the clean requires three pulls. The initial one begins from the ground and is slow and steady. The second pull occurs once the bar has passed the knees and is progressively rapid and powerful. The third pull initiates once the bar makes contact with your hips and continues to move up, the point where you begin to drop under it.
Timing is key! You can only start to move around the bar once ALL THREE pulls have been fully completed and you have obtained full extension.
A common mistake is to combine the second and third pull, many people bend their arms too early and do not complete the full extension. If you bend your arms too early you start to use pure strength rather than technique and will wind up losing power and having to use your arms in order to complete the lift. You may be able to get away with this while the weight is low, but this technique will not let you progress to heavier weights.
Tip: Try working on clean pulls to get a better understanding of the required speed.
Like with all lifts, your starting position will define the efficiency and the success of the movement. It can be tempting to start with your feet wide, as it feels more stable, but be careful not to put them too wide as you will then find yourself jumping into a position where you are unable to catch the bar.
Be mindful of your starting posture. Always start with a flat back, keep your hips behind your shoulders in a low squat position, your vision forward and your shoulders relaxed.
Tip: If you struggle to initially maintain this posture, start with the bar on lifts to elevate it to a position where you can maintain a straight back.
If you are lifting a weight that is too heavy, you can easily ‘lose’ your core and start arching your back. You must keep your back long and strong throughout the movement.
Tip: If you feel that you are lifting a good weight for you but you are still struggling to keep your back solid, double check that you are engaging your core through at every step of the lift. Core stability safeguards your back and helps to thwart injury.
The power clean is not a drill intended to boost endurance or general conditioning. This lift is devised to build force and power. With this in mind, you should keep reps low, perform between one and five repetitions of the movement. If you can accomplish five reps with little effort, try adding more weight.
In order to have the most efficient movement, the bar must remain close to the body. If the bar stays in a straight line, there is no risk that power will be wasted. However, if the bar moves away from the body, you will need a lot more strength in your arms to lift it up. This will use up more energy and prevent you from progressing to higher weights.
Tip: practicing the hang clean more can be a great way to work on keeping the bar closer to you and using the power from your hips.
Once you have mastered the practice moves and feel confident with your form, you can start to pull it all together in a power-clean workout.
Before training, spend at least 10 minutes warming up your ankle, hip, shoulder and wrist joints.
Take one to two minutes rest in between sets of cleans (more if you need to); one-minute rest between sets of other exercises.
This workout, designed by Level 5 USA Weightlifting coach Mike Burgener, should only be performed once a week. Be careful with adding weight, the suggestion is no more than 5 pounds per workout. It is best to stay safe and work progressively, be the tortoise not the hare!