The best online fitness resource you'll ever need. We filter out the BS to ensure you meet your health and fitness goals!
The best online fitness resource you'll ever need. We filter out the BS to ensure you meet your health and fitness goals!
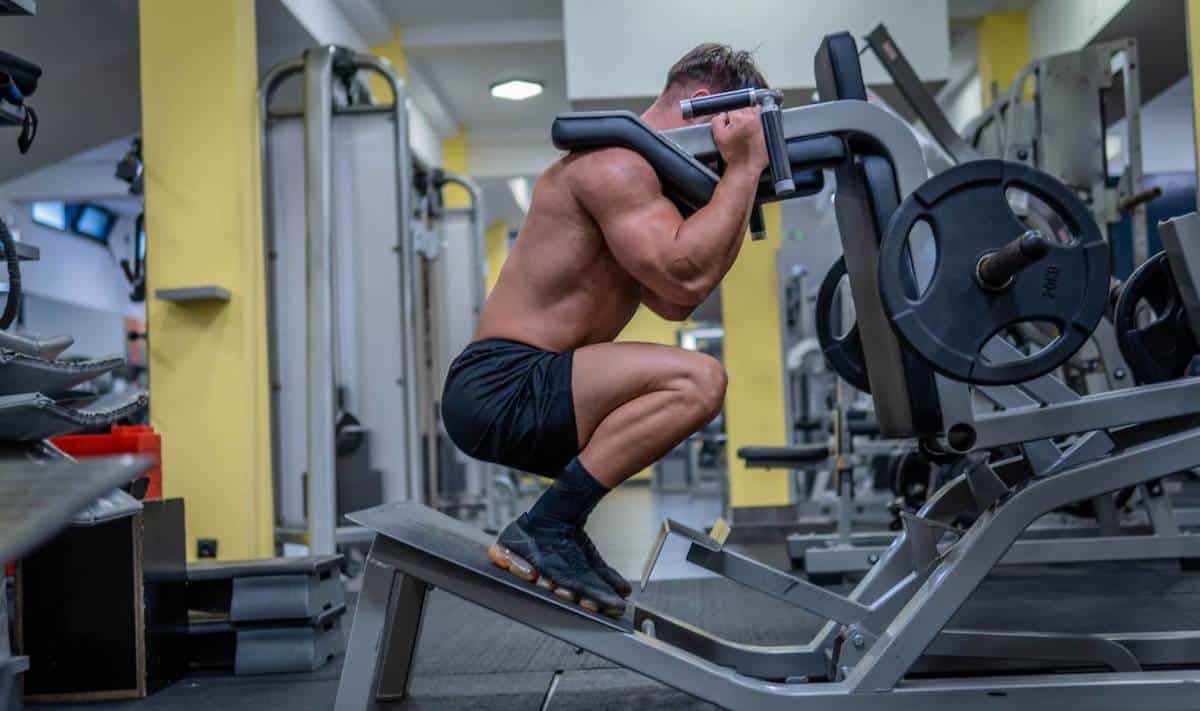
Gym machines are getting more sophisticated and there are more styles and mechanisms to choose from than ever before.
You can absolutely get a fantastic physique-shaping workout by using machines…maybe better than free weights. In fact, probably, depending on the machine of course.
So, if you’re considering going mechanical with your workout, we’ve got a gym machine workout routine for you, whether your workout facility has mostly machines, or a combination of free weights and machines.
Jump to the routine now!
Alternatively, you can download the free PDF version of the routine using the link below:
| Program style | Resistance training with gym machines |
| Workout duration | 1-2 hours |
| Scheduling | 3 days a week |
| Goal | Build muscle |
| Level | Beginners to advanced |
| Target Gender | Male and Female |
Free weights were once seen as the only gym implement that had the ability to help a person get jacked. Many still do… and they’d be wrong. Way wrong.
Here are a few of the reasons gym machines may be your best option at building and shaping muscle:
Look around at the folks who are competing in the championship physique contests. More and more and more of them are using fewer and fewer free weights.
We are not saying free weights are no longer useful. Not at all. It’s all about the context.
Sports, like weightlifting and powerlifting, require free weights. Training with them is central to the sport.
Some fitness objectives require working stabilizer muscles along with target muscles. Functional training is like that. So is rehab from injury or surgery.
For healthy individuals whose fitness goal is building specific body parts, machines are probably better due to their ability to let you concentrate on the target muscles.
Seats, pads, grips, optimized resistance curve mechanisms…all these inhibit your body’s natural inclinations to just do the task without regard for making better muscles.
Because of machines’ ability to specifically load a target muscle, this routine fits very well into a 3-Day Push Pull Leg format.
The program offers options for the equipment you choose. Your gym may have machines not specified in this routine. In the accompanying PDF, I included the machine types I see almost everywhere I go; these seem to be the most prevalent. If you’ve got a particular machine you like, and it does the job, go for it.
I put my preferred equipment choice in the left-hand column.
No matter what your schedule, or your preference, you can use this workout as your only routine, or supplement the one you have now.
For best results follow this routine religiously for 12 weeks.
If you’ve been living life in the power rack, get ready to be surprised. Expect to be surprised how challenging a gym machine routine is, and how much progress you’ll make on individual muscle groups.
Hey, I’m not throwing shade on barbell sports. I was a powerlifter and glad I was. There’s no feeling quite like putting a quarter ton on your back and squatting it below parallel.
Now that my fitness goals have changed to building specific muscles, I’m not going back to the rack.
You can also expect to be working out in a fully-stocked gym, unless you’ve got the resources to outfit a home gym with specifically-designed gym machines. This routine needs a commercial gym of some size.
There are a few machines that serve multiple purposes–like the Dual Arm Cable–so owning your own home gym with machines is possible. Your exercise selection will be limited.
Because of the gym machines’ ability to specifically load a target muscle, this routine fits very well into a 3-Day Push Pull Leg format.
| Day | Split |
|---|---|
| Push | Chest, Anterior shoulders, Triceps |
| Pull | Back (Lats, Trapezius, Posterior shoulders), Biceps |
| Legs | Quads, Hams, Lower legs, Glutes (and some lower back stuff) |
You’re probably familiar with the PPL format. It divides the body into logical subdivisions (typically one per day = 3 days), allowing intense concentration on a couple of muscle groups per workout while considering recovery needs on days following.
The Push Days are divided into chest and shoulder days. Here, Pull Days split focus between lats, middle, and lower trapezius muscles with biceps worked each day.
Leg Days divide up quad, hamstring, glute, and lower leg work into two days, spreading out tried-and-true muscle building movements to prevent overtraining.
The program offers options for the equipment you choose. Your gym may have machines not here. I included the machine types I see almost everywhere I go and seem to be the most prevalent.
If you’ve got a particular machine you like, and it does the job, go for it.
I put my preferred equipment choice in the left-hand column.
Pay attention to how each exercise feels to personally evaluate the piece of equipment that seems to work best for you. Don’t switch back and forth – give each one an honest try and critically assess your results.
The Gym Machine Workout will get into your muscles in a big way making your rest days crucial. Don’t be duped into thinking machines can’t exhaust the muscles.
Thoughtful scheduling of your rest days matters if you’re training intensely.
Here’s how rest days might be factored in:
| Weekday | Day | Split |
|---|---|---|
| Sunday | Push | Chest, Anterior shoulders, Triceps |
| Monday | Rest | |
| Tuesday | Pull | Back (Lats, Trapezius, Posterior shoulders), Biceps |
| Wednesday | Rest | |
| Thursday | Legs | Quads, Hams, Lower legs, Glutes (and some lower back stuff) |
| Friday | Rest | |
| Saturday | Rest |
Here’s another, my personal favorite. It provides 2 rest days before that hard leg day comes up again:
| Weekday | Day | Split |
|---|---|---|
| Sunday | Legs | Quads, Hams, Lower legs, Glutes (and some lower back stuff) |
| Monday | Rest | |
| Tuesday | Push | Chest, Anterior shoulders, Triceps |
| Wednesday | Rest | |
| Thursday | Pull | Back (Lats, Trapezius, Posterior shoulders), Biceps |
| Friday | Rest | |
| Saturday | Rest |
| Exercise | Set 1 | Set 2 | Set 3 | Set 4 |
|---|---|---|---|---|
| Chest Press | 15-20 | 10-12 | 8-10 | 8-10 |
| High Incline Press | 15-20 | 10-12 | 8-10 | 8-10 |
| Chest Flyes | 15-20 | 10-12 | 8-10 | 8-10 |
| Side Lateral Raises | 15-20 | 10-12 | 8-10 | 8-10 |
| Triceps Extensions (Attachment of Choice) | 15-20 | 10-12 | 8-10 | 8-10 |
| Exercise | Set 1 | Set 2 | Set 3 | Set 4 |
|---|---|---|---|---|
| Biceps Curls | 15-20 | 10-12 | 8-10 | 8-10 |
| Pulldowns | 15-20 | 10-12 | 8-10 | 8-10 |
| Seated Row | 10-12 | 10-12 | 8-10 | 8-10 |
| Shrugs | 15-20 | 10-12 | 8-10 | 8-10 |
| Reverse Flyes | 15-20 | 10-12 | 8-10 | 8-10 |
| Exercise | Set 1 | Set 2 | Set 3 | Set 4 |
|---|---|---|---|---|
| Squats | 15-20 | 10-12 | 8-10 | 8-10 |
| Leg Extensions | 15-20 | 10-12 | 8-10 | 8-10 |
| Hip Extensions | 15-20 | 10-12 | 8-10 | 8-10 |
| Hip Adductions | 15-20 | 10-12 | 8-10 | 8-10 |
| Hip Abductions | 15-20 | 10-12 | 8-10 | 8-10 |
| Leg Curls | 15-20 | 10-15 | 10-12 | 8-10 |
| Calf Raises | 15-20 | 10-15 | 10-12 | 8-10 |
Machines are designed to get at one specific muscle and the good ones can do it.
Some machines are in fact better than others and exactly ‘how good’ comes down to the type of machine.
Gym machines range from the simple to the mind-blowingly complex.
The original Universal Gym Genesis series worked with pulleys and simple Class II and III levers.
Along came Nautilus with its genius nautilus-shell cam design. Simple in concept but elegant from a muscle science perspective.
Hammer came later with plate-loaded versions that combined the appeal of a free weight experience without the bar.
Gym machine manufacturers continue to innovate.
There’s HOIST, whose ROC-IT™ machines’ seats move as you push or pull. Purist meathead critics say it turns lifting into a carnival ride.
Electronics have been included: gym bro meets computer geek. Matrix Ultra series machines count reps and rest times on digital displays right there beside the machine seat.Ironically, that function keeps you right there in the seat; no need to move.
Question: are sophisticated machines better than the simple ones?
Answer: it depends on design and context.
If you’re one of the lucky ones who work out in a gym that’s like a candy store for gym bros, you’ll have some decisions to make about which piece of equipment to use.
I belong to 2 gyms.
One is a multinational brand with locations everywhere I travel; it features machines almost exclusively.
The other is a local commercial gym with everything from basic functional fitness like jump ropes and punching bags, and a full array of machines ranging from the simplest of cables to the new-age machines mentioned above.
There are four different leg extension and curl machines, six different pulldown machines, three low row machines…I could go on. I’ve got options.
How do we decide which is best? Following are a few guidelines you can use to help make the right choice.
Obvious, right? You want to work the chest, pick the chest machine. You need a chest machine to do chest work, back machines to do back work. Super-simple, right? What is the “job” at hand?
Yes and no. The variety of machine design adds complexity. Your task is sussing out the pros and cons.
What if your gym has 5 different chest middle chest machines, not counting the low, high, and decline chest machines?
Here’s the quick answer: Select the machine that best works the intended muscle in the way the muscle is intended to work for your selected fitness context.
The downloadable gym machine workout routine PDF is designed for building muscle for size, shape, and tone (aka density). You can also use machines to support functional fitness, strength, or rehab goals.
Real-world examples follow. A little biomechanics speak is required.
The pec major is designed to bring the upper arm up and in toward the body, aka shoulder flexion and adduction. Note that the pec is really a shoulder muscle because it acts on the shoulder joint. Working this effectively will build the chest.
So…
Any chest machine that makes you bring the arm up and in under resistance is going to work the pec major, your chest.
Next question: Does the machine involve other muscles to move the weight? In other words, is it a compound or isolation movement?
How much it works the accessory muscles–the anterior delts and triceps–depends on the machine.
We just spoke about how a converging handle chest machine is “better” at working the chest than one with a straight-out pushing mechanism, or one whose handles move slightly outward rather than inward.
Factors like seat and handle position make a big difference.
What if the converging chest machine’s seat can’t be adjusted to your height, so that you can’t get your arms into correct position? Is it enough of a downside to make you go for the non-converging handles so your arms are in better position?
Maybe the other non-converging handle machine is better. You have to weigh the pros and cons.
Very few chest machines work for me at all because I have long arms for my height and I’ve got chronic tendonitis in one shoulder. Chest machine seats need to adjust higher for me to get my arms in position and avoid pain. Few machines work for me.
Little things like seat adjustment make a huge difference.
Seat design is important. Seats need to be secure and comfortable. They should adjust to position you relative to the moving part of the machine.
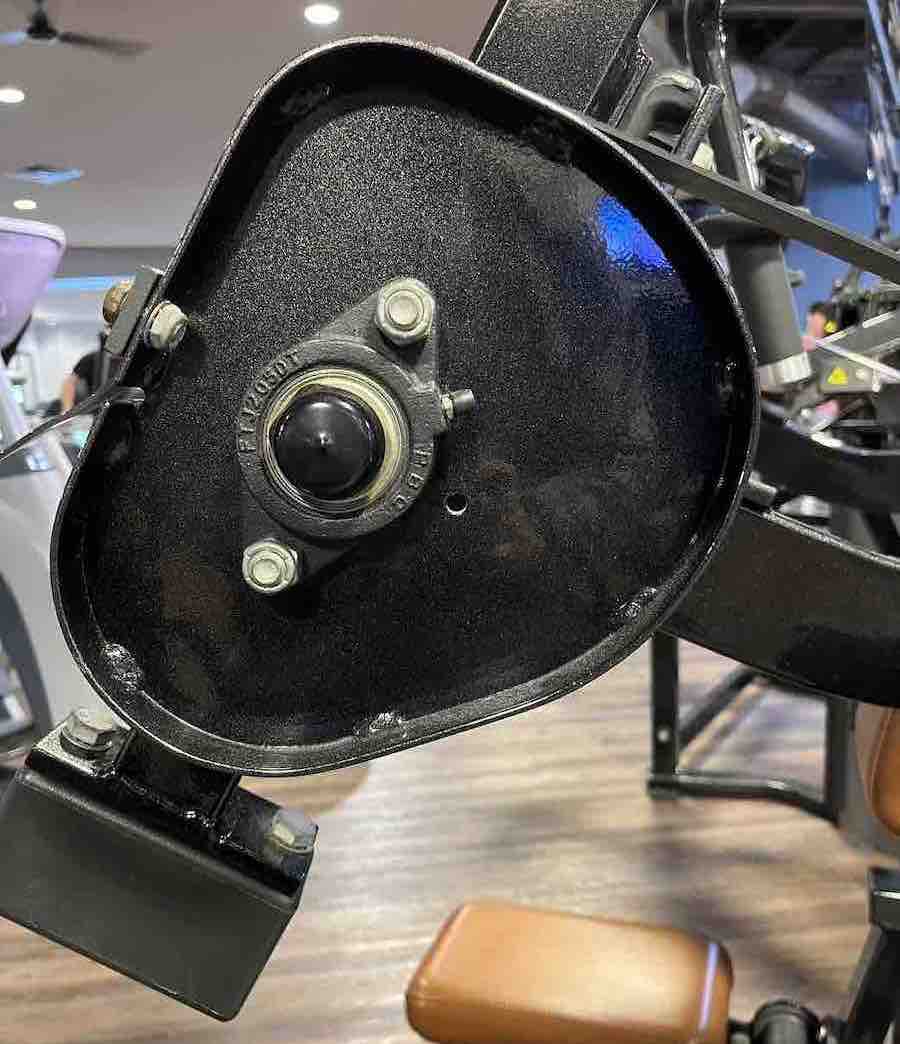
Machines with simple lever designs have pivot points that the lever arms rotate around. Alignment of these with the active joining is crucial.
Seat, chest, and back pad positioning play a big role in aligning the working joint with the pivot point.
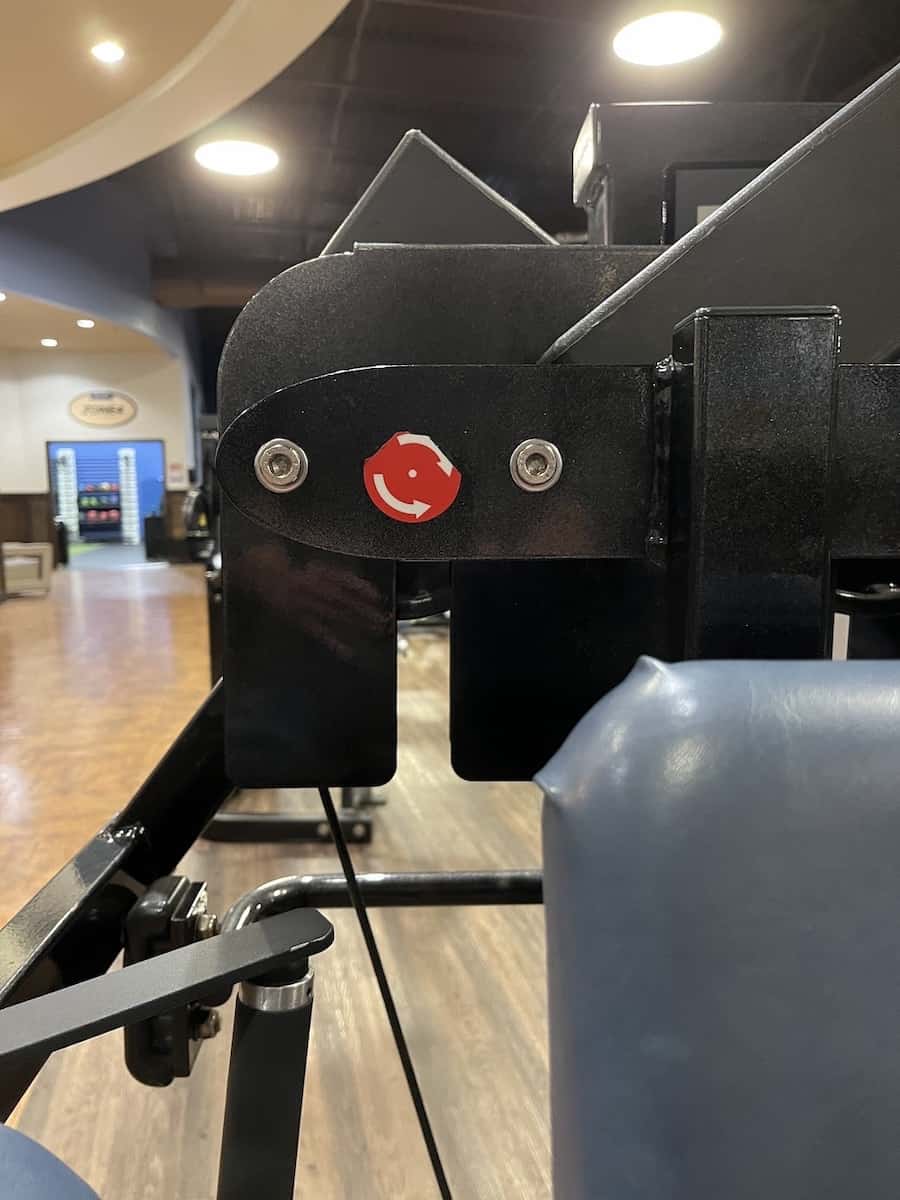
Pivot point on the Hammer Triceps Extension machine points where to align the elbow.
Chest and back pads provide a lot of the stability that makes gym machines such a great workout tool. They provide something to “push or pull against” that doesn’t require other muscles to do that job.
Pressing machines have back pads; back machines often have chest pads.
Personally, I need a row machine with a chest pad that positions my upper body far enough away from the handles to get my arms to full extension. I’ve got those really long arms.
The Hammer Low Row machine’s chest pad lets me get the stretch I need for the exercise to be effective, and its seat height is just high enough to put me in position to get tremendous effect from that machine.
Handle designs also play a primary role. A well-designed handle puts the hand, wrist, and forearm in position to do the work without adding stress to the wrist and elbow joints. Does the handle allow for a variety of grips or force you into one that’s unnatural?
Rubberized handle grips have a habit of sliding and working their way out of position on the handle with use. They’re great when they’re new, but over time and lots of use, those rubber sleeves migrate and get bunched up or come completely off the handle.
A better design in my experience is the matte finish metal grip. My personal fave is the TechnoGym three-sided matte finished metal handle. It fits perfectly in the hand, and the finish allows for a secure grip under real workout conditions. The textured metal design is also easier to clean than a polymer alternative.
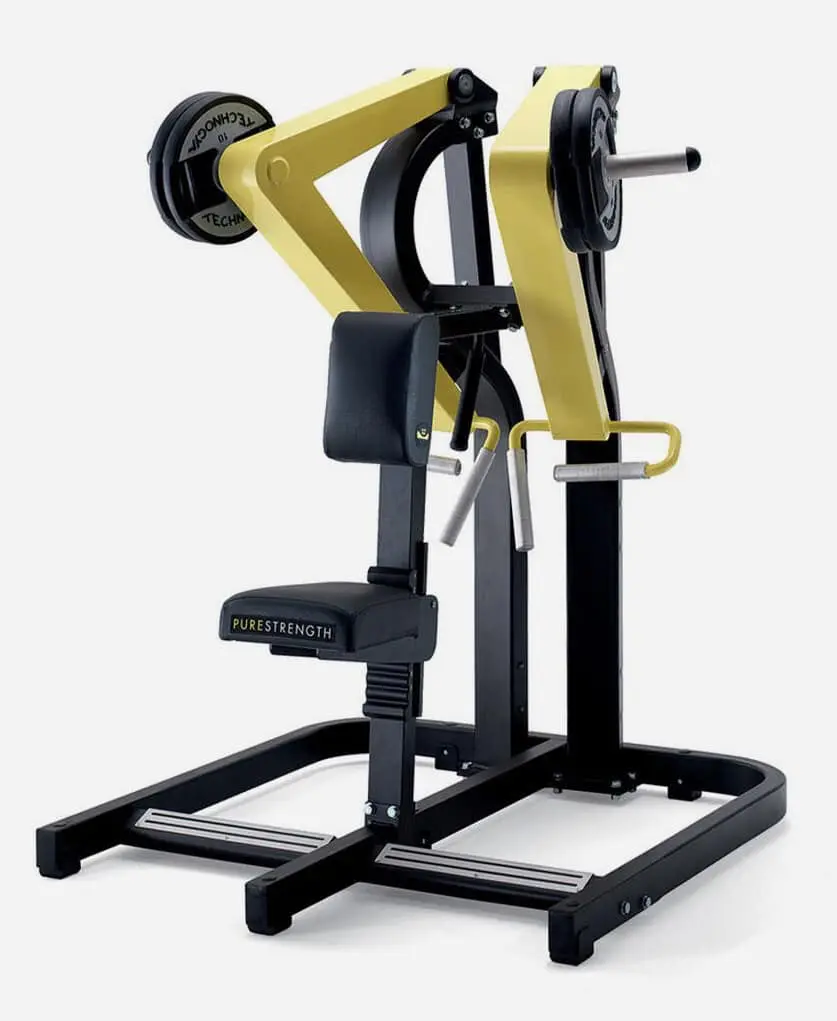
TechnoGym Pure Low Row Machine features a 3-sided matte finish metal grip and 2 sets of handles.
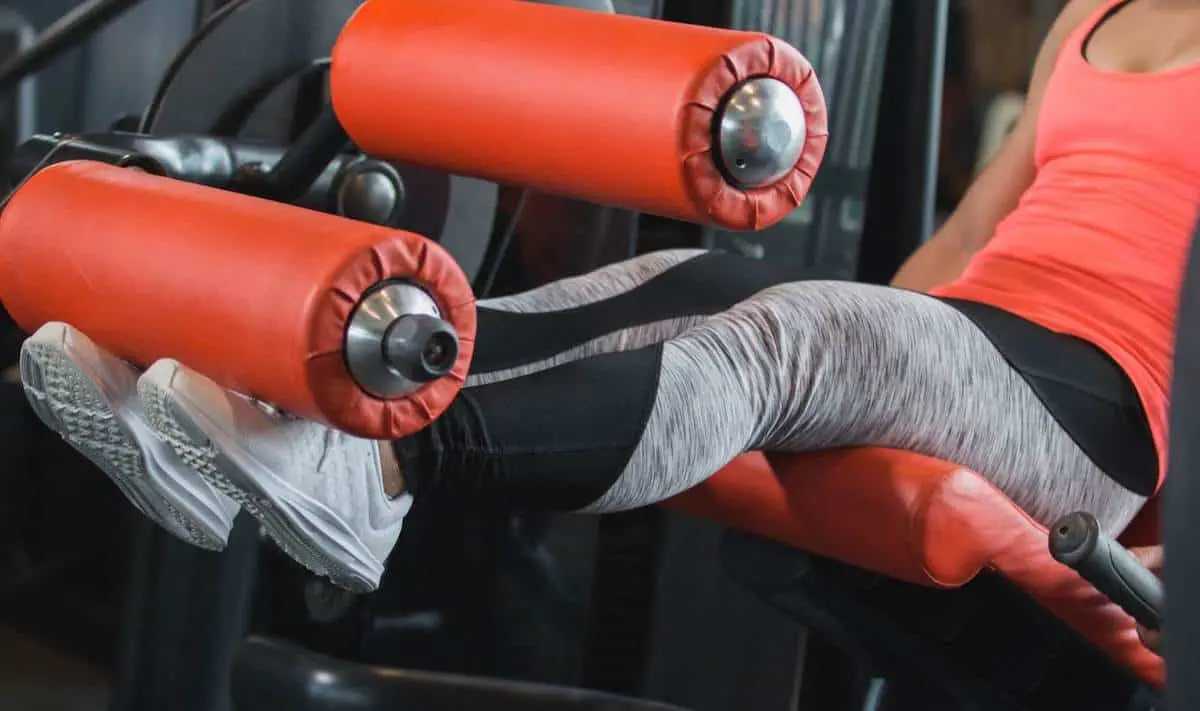
Design also applies to foot pad design on leg machines. The right foot plate will provide lots of options for stance and an angle that accommodates average ankle dorsiflexion without needing to add something to elevate the heel.
For leg curl and leg extension machines, can the pivot point be aligned with your knee joint? It should.
Do the leg pads meet your shins near the ankle, or mid-shin? Can they be adjusted where they need to be? For these exercises, the pad needs to be at the ankle joint and remain there throughout the motion, not rolling up and down the lower leg as you raise and lower.
Does the machine make the exercise easier at the beginning of the motion, or the finish? Does its design make it easier to get through the sticking points? And should it?
These are questions to ask when thinking about resistance curves.
To answer these, you need to know some biomechanics.
In general, for most applications, the muscle has the most mechanical advantage at the beginning of a movement and less as the muscle contracts because as the muscle shortens, its ability to contract further decreases.
Muscle contraction and lengthening under resistance is what it’s all about.
The best machines will make an exercise tougher in those phases of the motion where a free weight would be easy. And that’s part of what makes them awesome for building muscle size and shape. Optimizing the resistance curve for muscle-building was part of the genius of the original Nautilus design.
Take the lateral raise.
A dumbbell lateral raise is super-easy at the bottom. And if not exactly “easy”, easier than the top part of the range of motion. In the beginning 10 degrees or so of that exercise, the supraspinatus muscle is doing most of the work; the deltoid isn’t.
A well-designed Lateral Raise Machine makes the exercise a little more challenging at the beginning of the motion and involves the deltoids sooner, then maintains the tension throughout. Yes, the supraspinatus is still involved, but just try the DB version then immediately try the machine version to see what I mean here.
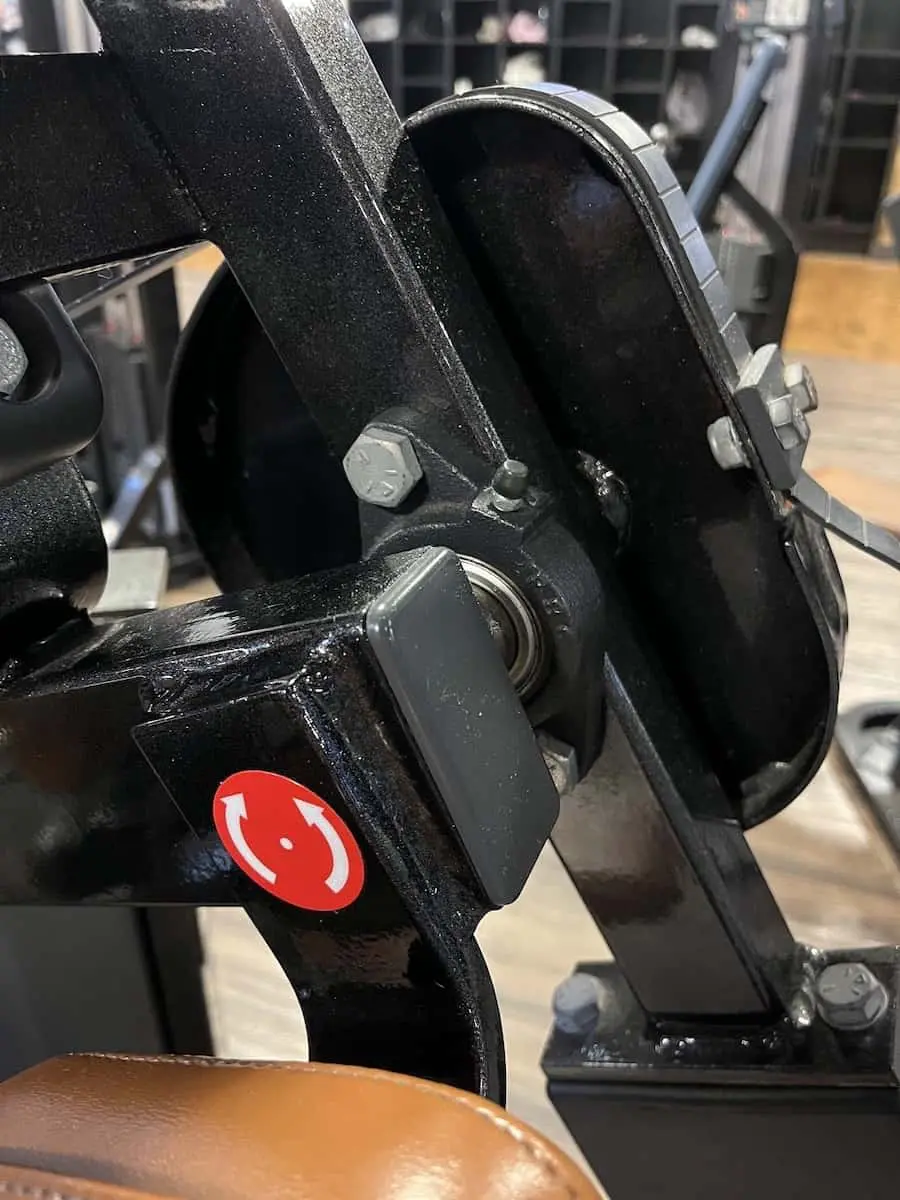
I recently started using the Hammer Strength Triceps Extension machine because its resistance curve loads the end range of motion. Hammer uses an eccentric belt-driven cam mechanism.
The cam makes the exercise as challenging as you’d find on a cable machine but then, as the forearm approaches the end range where the cable triceps extension gets easier, the cam’s design makes it harder.
As the handles move forward, the belt tracks around the cam, adding resistance by reducing the mechanical advantage.
Sometimes, picking the machine you’ll use depends on availability. Does your gym have the machine you like? And if it does, is somebody using it? Or worse, are they sitting there between sets, doom-scrolling. (Don’t get me started.)
If machine-in-use is the issue, the decision to move on to your second or third choice–or another exercise–is up to you. You’ll need to decide for yourself if it’s worth waiting.
These days, if a machine is occupied, I’ll wait three minutes and if the person is using it as a cell phone station, I just ask them if they’re working out or waiting for their latte to be delivered. I don’t care if they like me or not. I don’t want to work out around people who train with no intensity.
The immutable law of the gym. Achieve the specified rep range. Increase the weight so that you can only achieve the lower end of the rep range.
Simple.
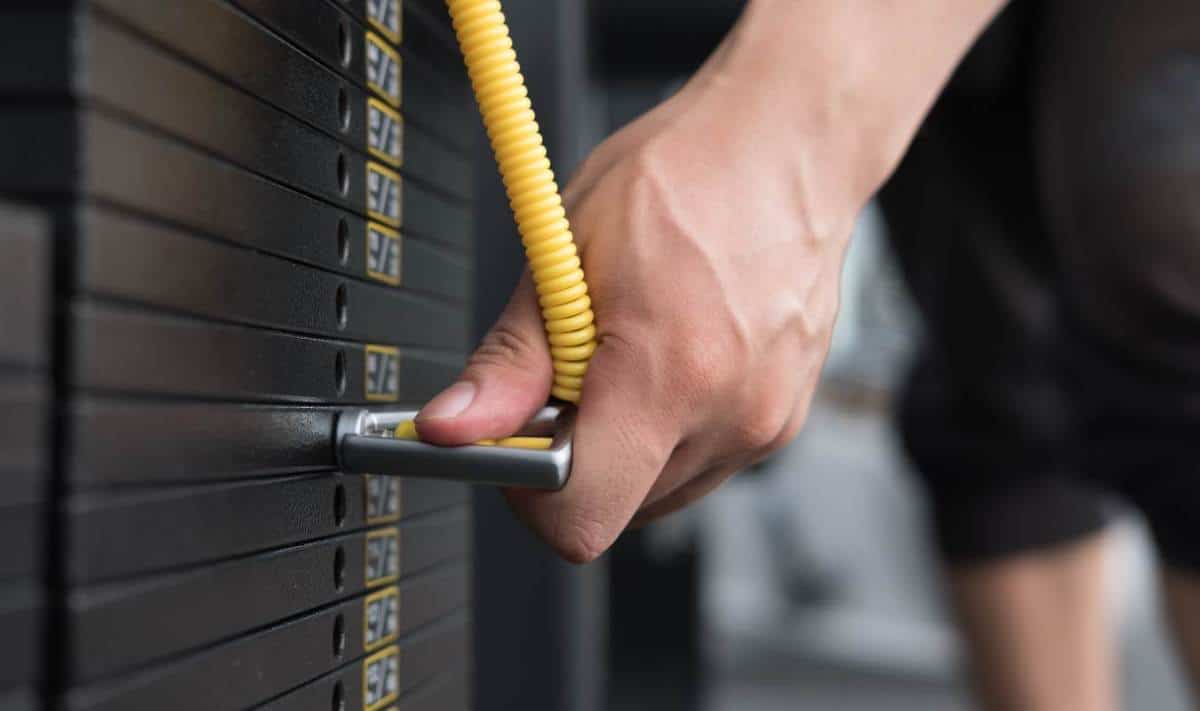
The weight on the machine may not–and probably isn’t–the actual weight being lifted.
Selectorized machines use cams and pulleys to transfer the force you generate to the weight. Lever arms affect force transfer also.
So that weight you’re putting on the machine should be used only as a gauge for your progress.
Here’s one example that almost no one knows. The plate-loaded leg press machine.
Machines that use cams, like the original Nautilus design, create a resistance curve to make the resistance more challenging. This was the genius of those original machines.
Cable machines with double and triple block-and-tackle pulley-style systems make the actual resistance lighter than a single pulley machine.
So, in summary…
Use the numbers on the weights as a means to benchmark your progress. Apply progressive overload. Remember that you’re trying to build muscles, not win a strength event.
Keep 1 to 2 reps maximum in reserve for the first 2 sets of each exercise. Go all-out with 0 RIR for the last 2. The last rep of the last set should be absolute max effort. If you could squeeze out another if someone held a gun to your head, you didn’t go all out.
That said…
Reps with lousy form don’t count, ever. I use penalty reps in my own workouts. If a rep stinks, I make myself do another. Amazing how much better this little hack will make your form.
Use a methodical, rhythmic, pumping motion. For my starter clients, I like to prescribe the 2-seconds-up-1-second-down guideline.
Eccentric phases should be slow and controlled. There’s no timing rule other than as a general gauge of rep speed.
Under no circumstances use momentum of any kind. Fortunately, machines prevent a lot of the cheats possible with free weights.
Clinical evidence supports two rest days, with the inside range being 1 day and the outside being as many as 3 days between workouts.
Studies of interest that investigated muscle recovery time:
Evidence suggests a recovery period of at least 48 hours is necessary for maximal muscle recovery after resistance training. The exact recovery time varies based on individual factors and the specific exercise.
Remember that your central nervous system (CNS) gets fatigued too. It needs recovery time as well.
Warm-up sets require just a minute or two between them. “Working” sets will require longer rest times. Target three minutes between sets.
Use your rest times to analyze the set you just did and prepare to improve on the next one. Ask yourself:
If you have a workout partner who’s more experienced than you (and knows what they’re doing), as for form critique.
Rest times are not an excuse to catch up on social media. Use rest times productively.
There’s no escaping the vitriolic debate of the free weight purists, that machines are for sissies and the only way to get truly jacked, swole…pick your street terminology for muscle…is with the “big three” barbell lifts, and by the way throw in some barbell curls, skull crushers, and power cleans while you’re at it.
Game on.
I can speak from experience as a reformed barbell Puritan.
I lived my gym life in the confines of the power rack and ventured out only for “accessory” work: triceps pushdowns, hammer curls, upright rows, leg extensions, leg presses. These were the lifts that just filled in what few gaps that squats, deadlifts, and barbell bench didn’t satisfy. As if.
So, I’ve got some perspective.
Here’s what happens in a great many muscle building routines. We’ll use squats for leg development as our example.
Bro warms up the squat. Then loads the bar for the working sets. Squeezes out 2, maybe 3 reps with great form before the back gets tired. Form goes to hell. Then the squat starts looking more like a Good Morning. Set ends, and bro congratulates himself on going beast mode.
Meanwhile, dude’s legs got a couple of reps worth of actual muscle building resistance while the back and hips got most of it.
Then…
Our gym bro heads over to the leg extension machine and gets after it. Does 3, 4, maybe 5 sets of quality leg extensions.
Legs grow. And guess what? Dude attributes his leg growth to squats, when in actual fact, the leg extensions are what really worked when you examine the exercise science.
There are way more important things to worry about and fight about in this world than barbells versus machines for skeletal muscle hypertrophy. But for getting the best possible benefit from your gym hour, machines are it, and there are bigger badder dudes than me (like Paul Carter for instance) who will tell you exactly the same thing.
Oh yeah…and dumbbells.
Enjoy the workout, and please let us know how it works for you.
Download our Gym Machine Workout Routine PDF below:
If you’d enjoy having us customize this program just for you for your unique situation or goals, contact us or reply in the comments. First come, first served.